DHCP
¿Qué es?
Protocolo de
configuración dinámica de host
Función
Configuración
automática de parámetros de red
Glosario
Parámetros: es
una variable utilizada para recibir valores de entrada en una rutina, subrutina
o método. Dichos valores, que serán enviados desde la rutina invocante, son
llamados argumentos.
Host: El
término host o anfitrión se usa en informática para referirse a las
computadoras u otros dispositivos conectados a una red que proveen y utilizan
servicios de ella
Procedimiento
1. Nos vamos al cliente y nos vamos a centro de recursos compartidos y seleccionamos la primera conexión de área local.
1. We go to the client and we go to the shared resources center and select the first local area connection.
2. Nos vamos a propiedades, seleccionamos IP
versión 4, nos vamos a propiedades. Y ahí se le va a hacer un cambio, de una IP
estática a una IP dinámica, con esto se va a comprobar que el servidor DHCP
funcione correctamente.
2. We go to properties, we select IP version 4, we go to properties. And there we are going to make a change, from a static IP to a dynamic IP, with this we will verify if the DHCP server works correctly.
3. Damos clic dos veces en cerrar, y ahora nos
vamos al servidor. Damos inicio, y nos vamos al administrador del
servidor, nos vamos a funciones y nos vamos a agregar funciones.
3. We click twice to close, and now we go to the server. We go to start, and we go to the server administrator, we go to functions and we are going to add functions.
4. Muestra una breve información de lo que es el
servicio, damos clic en siguiente. Después nos va a dar una lista de los servicios
que ofrece el servidor y seleccionamos el DHCP Server.
4. It shows a brief information of what the service is, we click next. Then he will give us a list of the services offered by the server and select the DHCP Server.
5. Damos clic en siguiente, y nos aparece una introducción
de lo que es el servidor DHCP, damos clic en siguiente. A continuación nos aparece lo que es la IP del
servidor, la cual es muy importante, porque significa que está instalado
correctamente.
5. We click on next, and an introduction of what is the DHCP server appears, we click on next. Below is what the server IP is, which is very important, because it means that it is installed correctly.
6. En este caso no tenemos ningún dominio, así que,
se va a borrar el IP, y damos clic en siguiente.
6. In this case we don't have any domain, so, the IP is going to be deleted, and we click on next.
7. Lo que se va a hacer en los ámbitos es agregar un rango de IP, nos vamos a agregar. Vamos a poner el nombre del ámbito, que en este caso será oficina. Y después ponemos la IP inicial (192.168.10.2). Después nos vamos a la IP final (192.168.10.10). Después colocamos la máscara de red (255.255.255.0) y en la siguiente casilla no ponemos nada, y damos clic en activar el ámbito.
7. What is going to be done in the fields is to add a range of IP, we are going to add. We will put the name of the field, which in this case will be office. And then we put the initial IP (192.168.10.2). Then we go to the final IP (192.168.10.10). Then we put the netmask (255.255.255.0) and in the next box we do not put anything, and we click on activate the scope.
8. Damos clic en siguiente, y después vamos a deshabilitar
lo que es la IP versión 6, porque nosotros utilizamos la versión 4, y damos
clic en siguiente. Después no aparecerá toda la información que ya
pusimos y le damos clic en instalar, y esperamos la instalación.
8. We click on next, and then we will disable what is IP version 6, because we use version 4, and click on next. After that, all the information we have already entered will not appear and we will click on install, and we will wait for the installation.
9. Cuando esté completa la instalación, damos clic
en cerrar, nos vamos al inicio y damos clic en herramientas administrativas y
seleccionamos DHCP. Aparece el servidor, le damos clic y aparecen las dos IP. Vamos a IP versión 4, la abrimos, y en el ámbito, vamos a ver los rangos de las IP.
9. When the installation is complete, we click close, go to the beginning and click on administrative tools and select DHCP. The server appears, we click and the two IPs appear. We are going to IP version 4, we open it, and in the scope, we are going to see the IP ranges.
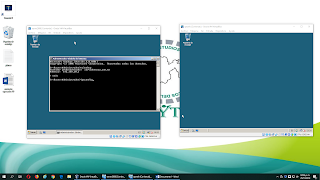
10. Vamos al cmd para comprobar. Y ahí, vamos a colocar primero “ns lookup” para
comprobar la conexión, y damos clic en “exit” para cerrar el proceso. Y nos
vamos a ipconfig, ahí nos aparece la IP del servidor. Y nos
vamos al cliente y hacemos lo mismo.
10. We go to cmd to check. And there, we will first place “ns lookup” to check the connection, and click on “exit” to close the process. And we go to ipconfig, there appears the IP of the server. And we go to the client and we do the same.
Vídeo:


Comentarios
Publicar un comentario