DNS
Sabías que…
Los servidores
DNS juegan un papel fundamental en la navegación por Internet, y tienen una
importante influencia sobre la velocidad y el rendimiento de tu
acceso a la red.
¿Qué significa?
Domain Name System . Sistema de Nombre de Dominio
Función
Es traducir
direcciones IP a nombres de dominio.
Glosario
Dominio:
Un dominio, en redes de computadoras, puede referirse a dos cosas: El
conjunto de computadoras conectadas en una red informática que
confían a uno de los equipos de dicha red, la administración de los usuarios y
los privilegios que cada uno de los usuarios tiene en dicha red.
IP: La
dirección IP es un número que identifica, de manera lógica y jerárquica, a una
Interfaz en red de un dispositivo que utilice el protocolo o, que corresponde
al nivel de red del modelo TCP/IP.
¿Cómo nace?
Nació de la
necesidad humana para recordar fácilmente los nombres de los
dominios conectados a una red en vez de recordar una dirección IP.
Vídeo:
Procedimiento
1. Vamos a inicio, y abrimos "propiedades del equipo". Después, damos clic en "cambiar configuración" y damos clic en "cambiar".
1. Open start, and open "device properties". Next, we click on "change settings" and click on "change".

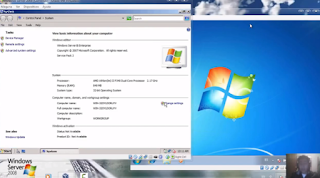

2. Configuramos el nombre de la computadora, y le pondremos como nombre "servidor". Y en el gurpo de trabajo le pondremos "oficina"
2. Configure the name of the computer, and name it "server", and in the work group, we will name it "office".


3. Damos clic en "ok" dos veces, nos pedirá un reinicio de sistema, y le daremos "aceptar".
3. We click "ok" twice, it will ask us for a system reboot, and we will click "accept".

4. Al terminar el reinicio, vamos al equipo cliente y realizaremos el mismo proceso. Sólo que ahora al nombre de la máquina le pondremos "cliente 1".
4. At the end of the system reboot, we go to the client computer and we will carry out the same process. Only now to the name of the machine we will put "client 1".


5. Al terminar el reinicio, nos vamos al equipo servidor.
5. When the system reboot is finished, we go to the server computer.

6. Abrimos redes y centro de recursos compartidos, y damos clic en administración de conexiones de red.
6. Open networks and shared resources center, and click on network connection management.


7. Damos clic en las propiedades de la LAND. Seleccionamos el protocolo IP versión cuatro y damos clic en propiedades.
7. We click on the properties of the LAND. Select the IP protocol version four and click on properties.


8. Marcamos la casilla "usar la siguiente dirección IP", y en la dirección IP escribiremos: 192.168.10.1. En la máscara de red se dejará por defecto.
8. Check the box "use the following IP address", and in the IP address we will write: 192.168.10.1. In the netmask it will be left by default.

9. Y en el servidor DNS preferido, se pondrá lo mismo que se puso en la dirección IP. Damos clic en aceptar, y cerramos.
9. And on the preferred DNS server, the same as what was put on the IP address will be put. We click on accept, and close.


10. De la misma manera, hay que hacer el mismo procedimiento en el equipo "cliente 1".
10. In the same way, the same procedure must be done on the "client 1" device.

11. Ahora nos vamos al equipo servidor y abrimos el administrador de servicios. Nos vamos a funciones, y damos clic en agregar funciones.
11. Now we go to the server computer and open the service manager. We go to roles, and click on add roles.


12. Nos dará una introducción, y damos clic en siguiente. Y ahí, nos aparecerá una lista de las funciones que podemos agregar al servidor.
12. We will be given an introduction, and click next. And there, we will see a list of the roles that we can add to the server.


13. Elegimos la de DNS server, marcamos la casilla, y damos siguiente dos veces. Empezamos a instalar el servicio. Esperamos a que se instale.
13. We choose the DNS server, check the box, and give next twice. We started installing the service. We wait for it to install.


14. Y mientras se instala, vamos a hacer un paso importante que es el desactivar los firewall. Para esto, abrimos inicio y buscamos firewall. Y damos clic en Windows firewall.
14. And while it is installed, we are going to take an important step that is to disable firewalls. For this, we open up and look for firewall. And we click on Windows firewall.


15. Nos vamos a "turn Windows firewalls on or off", marcamos la casilla de "off". Aplicamos los cambios y cerramos.
15. We go "turn Windows firewalls on or off", check the "off" box. We apply the changes and close.


16. Realizamos el mismo proceso en el cliente
16. We perform the same process on the client

17. Ya que nos salio el estatus de la instalación. Nos vamos a inicio a Herramientas Administrativas para abrir el DNS, dentro de el abrimos el SERVIDOR y vienen las zonas directas e inversas,seleccionaremos zona directa y creamos una nueva.
17. Since the installation status came out. We go to start Administrative Tools to open the DNS, within it we open the SERVER and come the direct and inverse zones, we will select a direct zone and create a new one.

18. A los siguientes pasos le daremos siguiente. En el nombre de la zona le pondremos un nombre cualquiera con la terminación .com.mx
18. The following steps will be given next. In the name of the area we will put any name with the ending .com.mx


19. Posteriormente iniciamos con la nueva zona inversa, zona principal seleccionaremos IPv4 , en la red ID introducimos los primeros tres términos. Y a los demás le damos siguiente.
19. Then we start with the new reverse zone, the main zone we will select IPv4, in the ID network we introduce the first three terms. And we give others the following.


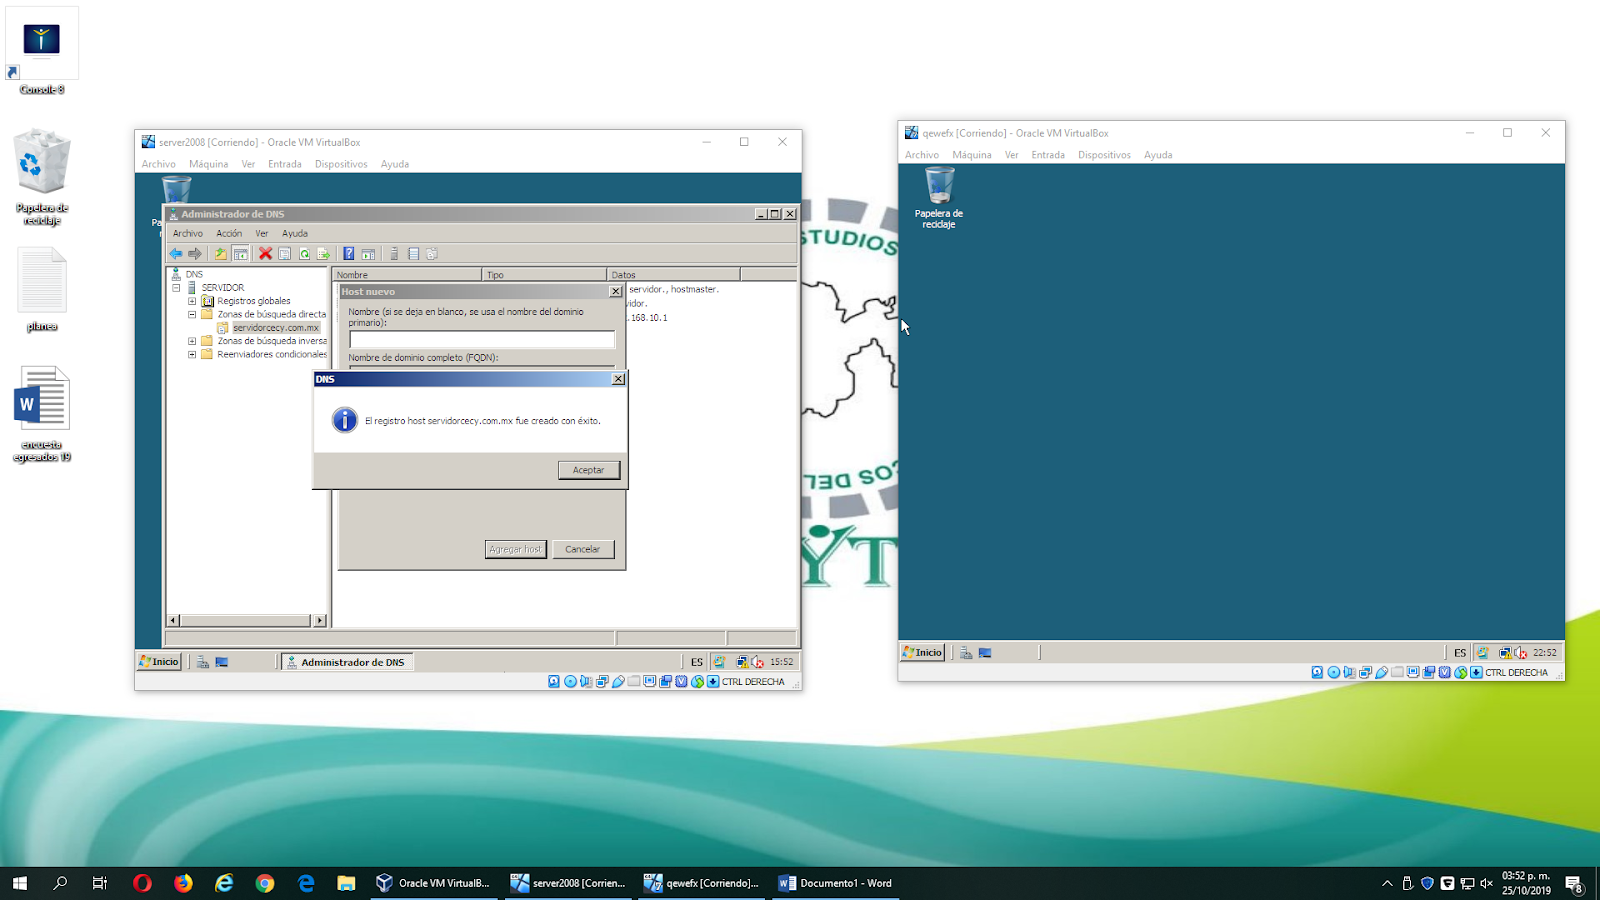
20. Abrimos el servidor que creamos en la zona directa,damos clic derecho y agregamos un nuevo host, añadimos la direccion IP marcamos la casilla crear nuevo pointed para que se cree tambien en la zona inversa.
20. Open the server that we created in the direct zone, right click and add a new host, add the IP address, check the box create new pointed so that it is also created in the reverse zone.


21. De la misma forma volvemos a hacer lo mismo pero con el equipo cliente.
21. In the same way we do the same thing again but with the client team.


22. Nos dirigimos a la zona indirecta,damos clic derecho actualizamos y haremos un nuevo pointed,buscamos el archivo correcto en este caso el del cliente y lo añadimos.Nos saldrá que ya esta añadido .
22. We go to the indirect zone, we right click update and we will make a new pointed, we look for the correct file in this case that of the client and we add it. It will come out that it is already added.

23. Para verificar la funcionalidad del servicio abrimos el símbolo del sistema "nslookup".
23. To verify the functionality of the service we open the command prompt "nslookup".


24. De la misma manera hacemos con el cliente,para verificar que tengamos conexión.
24. In the same way we do with the client, to verify that we have connection.

Vídeo:
Procedimiento
1. Vamos a inicio, y abrimos "propiedades del equipo". Después, damos clic en "cambiar configuración" y damos clic en "cambiar".
1. Open start, and open "device properties". Next, we click on "change settings" and click on "change".


2. Configuramos el nombre de la computadora, y le pondremos como nombre "servidor". Y en el gurpo de trabajo le pondremos "oficina"
2. Configure the name of the computer, and name it "server", and in the work group, we will name it "office".


3. Damos clic en "ok" dos veces, nos pedirá un reinicio de sistema, y le daremos "aceptar".
3. We click "ok" twice, it will ask us for a system reboot, and we will click "accept".

4. Al terminar el reinicio, vamos al equipo cliente y realizaremos el mismo proceso. Sólo que ahora al nombre de la máquina le pondremos "cliente 1".
4. At the end of the system reboot, we go to the client computer and we will carry out the same process. Only now to the name of the machine we will put "client 1".


5. When the system reboot is finished, we go to the server computer.

6. Abrimos redes y centro de recursos compartidos, y damos clic en administración de conexiones de red.
6. Open networks and shared resources center, and click on network connection management.


7. Damos clic en las propiedades de la LAND. Seleccionamos el protocolo IP versión cuatro y damos clic en propiedades.
7. We click on the properties of the LAND. Select the IP protocol version four and click on properties.


8. Marcamos la casilla "usar la siguiente dirección IP", y en la dirección IP escribiremos: 192.168.10.1. En la máscara de red se dejará por defecto.
8. Check the box "use the following IP address", and in the IP address we will write: 192.168.10.1. In the netmask it will be left by default.

9. Y en el servidor DNS preferido, se pondrá lo mismo que se puso en la dirección IP. Damos clic en aceptar, y cerramos.
9. And on the preferred DNS server, the same as what was put on the IP address will be put. We click on accept, and close.


10. In the same way, the same procedure must be done on the "client 1" device.

11. Now we go to the server computer and open the service manager. We go to roles, and click on add roles.


12. Nos dará una introducción, y damos clic en siguiente. Y ahí, nos aparecerá una lista de las funciones que podemos agregar al servidor.
12. We will be given an introduction, and click next. And there, we will see a list of the roles that we can add to the server.


14. Y mientras se instala, vamos a hacer un paso importante que es el desactivar los firewall. Para esto, abrimos inicio y buscamos firewall. Y damos clic en Windows firewall.
14. And while it is installed, we are going to take an important step that is to disable firewalls. For this, we open up and look for firewall. And we click on Windows firewall.


15. Nos vamos a "turn Windows firewalls on or off", marcamos la casilla de "off". Aplicamos los cambios y cerramos.
15. We go "turn Windows firewalls on or off", check the "off" box. We apply the changes and close.


16. Realizamos el mismo proceso en el cliente
16. We perform the same process on the client

17. Ya que nos salio el estatus de la instalación. Nos vamos a inicio a Herramientas Administrativas para abrir el DNS, dentro de el abrimos el SERVIDOR y vienen las zonas directas e inversas,seleccionaremos zona directa y creamos una nueva.
17. Since the installation status came out. We go to start Administrative Tools to open the DNS, within it we open the SERVER and come the direct and inverse zones, we will select a direct zone and create a new one.

18. A los siguientes pasos le daremos siguiente. En el nombre de la zona le pondremos un nombre cualquiera con la terminación .com.mx
18. The following steps will be given next. In the name of the area we will put any name with the ending .com.mx


19. Posteriormente iniciamos con la nueva zona inversa, zona principal seleccionaremos IPv4 , en la red ID introducimos los primeros tres términos. Y a los demás le damos siguiente.
19. Then we start with the new reverse zone, the main zone we will select IPv4, in the ID network we introduce the first three terms. And we give others the following.


20. Abrimos el servidor que creamos en la zona directa,damos clic derecho y agregamos un nuevo host, añadimos la direccion IP marcamos la casilla crear nuevo pointed para que se cree tambien en la zona inversa.
20. Open the server that we created in the direct zone, right click and add a new host, add the IP address, check the box create new pointed so that it is also created in the reverse zone.


21. De la misma forma volvemos a hacer lo mismo pero con el equipo cliente.
21. In the same way we do the same thing again but with the client team.

22. Nos dirigimos a la zona indirecta,damos clic derecho actualizamos y haremos un nuevo pointed,buscamos el archivo correcto en este caso el del cliente y lo añadimos.Nos saldrá que ya esta añadido .
22. We go to the indirect zone, we right click update and we will make a new pointed, we look for the correct file in this case that of the client and we add it. It will come out that it is already added.

23. Para verificar la funcionalidad del servicio abrimos el símbolo del sistema "nslookup".
23. To verify the functionality of the service we open the command prompt "nslookup".


24. De la misma manera hacemos con el cliente,para verificar que tengamos conexión.
24. In the same way we do with the client, to verify that we have connection.

Comentarios
Publicar un comentario